When Christopher and Angela were still babies, Kenneth and I would hold them on our laps while we read to them. We would discuss the illustrations, and then read the words of the story. Our children saw how we treated the books with care, turning the pages gently and replacing them on a shelf or in a special book box when we were finished reading. So they came to understand that books were treasured little packages that opened up worlds of wonder.
As they grew, we showed them how to make little books of their own. Their first books were made with only pictures; later ones included writing. Often ten pages, each a half or quarter of an 8 ½- by 11-inch sheet of paper, made a book. I would then add a colorful constrution paper cover and either punch holes in the pages and tie them together with colorful yarn or staple them at the side.
Following are some ideas to help get you started. They are listed in order from beginner to more advanced. Invite children to do the following lessons, but allow them to work as their interest moves them. Give them the opportunity to repeat activities as long as they wish. Likewise, if they show little interest, don’t press the issue; know that the time isn’t right for the concepts you are presenting. Let some time pass, then introduce the project another day. Keep your time together upbeat. Learning new things is fun!
Reading
Try to read with your child every day. Make a habit of doing so at a certain time, so that both you and your child will look forward to the event.
Take your child on regular outings to your local library. Browse the stacks of children’s books together and let him choose some. Provide a “special home” for the library books while they are visiting your family. This could be a reserved place on a bookshelf or a cardboard box decorated with bright contact paper.
Before you begin reading, invite your child to wash his hands before touching the book. Show him how to turn the pages gently, so they don’t get torn or bent. It’s not uncommon for young children to want to hear the same stories over and over; try to be patient and tell the story with enthusiasm each time.
Discuss the illustrations, make observations, and ask questions about the artwork or pictures. Ask what he thinks will happen next. Run your finger under the words as you read them, so he can follow along. Doing this will help him understand that words convey meaning.
Start a home library for your child. Let relatives and friends know that books are welcomed gifts on birthdays and holidays. Set aside a special shelf or decorated box for these books. If you have the space, create a reading nook—with a small chair, stack of pillows, or beanbag chair—by the books.
Continue reading aloud with your child, even after he begins to read for himself. When he is able, encourage him to read the easy words. As his proficiency improves, alternate reading sentences and paragraphs with him. Later, invite him to read simple books to you; read more difficult books to him in return.
Letter Sounds
Each letter of the alphabet has a name and one or more sounds. The letter b, for example, has the name bee, but its sound is short and explosive without any following vowel tone.
Practice saying the sounds of the letters and use those sounds when doing the following projects with your child. You can listen to the alphabet sounds here.
Each vowel (a, e, i, o, u) represents two or more sounds. Notice the a in cat, cake, and father. To simplify, teach your child the short sound of each vowel as demonstrated by these words: cat, hen, sit, hop, hut. This will give him the tools to begin reading simple words and sentences.
When you say the consonants (all the letters that are not the vowels—a, e, i, o, u) try to say just the sound of the letter. With b for example, say the word bat. Now say the b sound without the at that follows. The letters b, c, d, g, j, k, p, and t have short, explosive sounds. Try isolating their sounds in these words: bat, cat, dig, gun, jam, kitten, pin, top. The sound for letter h is also short, but it is quietly exhaled as in hat. Another short sound is y. Say it as in yarn.
The sounds for f, l, m, n, r, s, v, w, and z are held longer. Say them as the first sound in the words fox, lamp, mop, nut, run, sit, vase, window, and zebra. The letter q is always followed by u and is said kw as in quiet. The letter x combines two sounds and is said ks as in fox.
Do teach your child the names of the letters (Aee, Bee, Cee, etc.), but emphasize the phonetic sounds of the letters and your child will soon be able to decipher simple words.
Letter Art
Help your child become familiar with the shapes and sounds of the letters by using them in various art projects. Focus on one letter at a time, preferably the small letters (instead of capitals), as these will be first letters he learns to write. Here are some ideas:
Sponge Prints: Cut a sponge into the shape of a letter. Tell your child the letter’s sound and ask him to say it several times. Show him how to dip the sponge into a tray of poster paint and press onto a sheet of paper. Invite him to make many prints, saying the letter’s sound each time.
Fill in the Shape: Outline a letter on a large piece of paper. Demonstrate how to trace the letter’s shape with your fingers (in the same manner that you would write it) and say its sound. Provide a bowl of small items—such as cereal, pasta, or paper scraps—for your child to glue onto the shape. Make sure to supervise, so that he doesn’t swallow the items. When dry, hang the art on a wall and refer to it often, saying, “Hello b,” for example.
Letter Cards: To prepare, write each letter of the alphabet onto individual pieces of cardstock. Working in alphabetical order and doing no more that one to three letters at a time, demonstrate how to trace each letter’s shape with your fingers (in the same manner as you would write it) and say its sound. With your child, squirt a line of glue over the letter. Lay a length of yarn or string over the glue and set it aside to dry. Later, invite your child to trace over the line with his fingers and say its sound, as demonstrated before. Repeat with other letters on other days. Once you have a complete alphabet collection, keep in a basket or box. You can use these cards in some of the projects below when the instructions ask you to make letter cards.
Alphabet Banner: Invite your child to choose a variety of different colored sheets of construction paper. Cut the sheets into quarters. With black marker, write one letter of the alphabet on each page, saying its sound each time and inviting your child to say its sound with you. Work in alphabetical order. Punch a hole at the top of each page and tie it onto a long ribbon. Alternately, tape each page to a wall. This project can be done over a series of days or weeks, doing a few letters each session. Once the letters are hung, point to them and greet them in turn, saying, “Hello a,” etc.
Letter Activities
Alphabet Book: This book is a great way to help your child learn the letter shapes and sounds. For very young children, prepare the book yourself and “read” it together. Let older children construct as much of the book as they are able.
To prepare, cut twenty-eight half sheets of cardstock or thick paper. Punch three holes down the side of each page. Write “My Alphabet Book” on one of the pages to make the front cover. Now write the letters of the alphabet, from a to z, on one side of each of the remaining pages. Bind all the pages together with yarn. When you open the book you will see a letter on the right and a blank page on the left.
To complete the book, on the blank pages draw or glue on pictures of one or more things that begin with each letter. Make sure the items begin with that letter’s sound (for the vowels, be sure to use the short sounds). For example, pair the letter a with a picture of an apple. The letter will be on the right page and the apple facing it on the left.
Read the book with your child by saying each letter’s sound, and then saying the name of the item or items that begin with that sound. As your child becomes familiar with the “story,” have him read it with you often. This is a highly effective way to help children learn the alphabet.
Learning the Letters: Use these two steps to help your child learn the letter sounds and shapes. Write the alphabet letters on pieces of paper or index cards, one per sheet. Write the consonants in red and the vowels (a, e, i, o, u) in blue. Store the letter cards in a box or basket.
Step One, “This Is”: Set out three to five letter cards. Point to a letter and say its sound, “This is a.” Show your child how to trace the letter with his fingers in the same pattern that it is written. Invite your child to say its sound and trace it several times. Repeat with the other letters, presenting a few at a time over a period of days or weeks until he is familiar with them all.
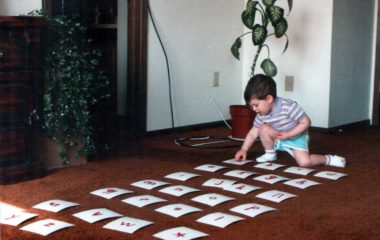
Step Two, “Give Me This”: Once your child is familiar with the letters’ sounds, set out some of the letter cards in one or more rows on the floor. Sit across the room and ask him to bring you the cards one at a time by asking for them by name. Say, “Can you please bring me the m card?” Thank him each time he brings you a card and says its name. Keep the activity fun. This is a game! If he makes a mistake, don’t correct him, but review the problem letter at a later time.
Hide and Seek: Draw single letters on paper and hide them around the house. Invite your child to find the letters and bring them to you. Have him tell you each one’s sound as he presents them to you. You, in return, can greet each letter by saying, “Hello a,” for example. Place the letters in a basket to await another game on a later day.
Matching Letters: Write two complete sets of lower case alphabet letters on cards, one letter per card. Write the consonants in red and the vowels (a, e, i, o, u) in blue. At first, work with just a few sets, increasing the number of letters as your child becomes more proficient with the activity. Lay one set of letters in a vertical line, saying their sounds as you set them down. Arrange the matching letter cards at random to the side. Demonstrate, then invite your child to look at the top letter in the row, say its name, and then look at the cards set at random to find its mate. Set the matching card to the right of its mate.
Matching Capitals to Small Letters: Write two sets of alphabet letters: one capital letters and the other small letters. Working with small sets, set out the small letters and say their letter sounds. Show your child how to match the capitals with the small letters, saying, “Little a. Big A.” Do this activity in a series of short lessons until your child can easily match the capitals with the small letters.
Discover Letters
Make a game out of finding letters in your environment. Say, “Look, there’s an h!” “Can you find another h?”
Letter of the Day
Pick one letter each day. In the morning, write the chosen letter on the top of a piece of construction paper and tack it on the wall. As the day progresses, add drawings, words and pictures of things that begin with that letter. Show your child how to write the letter and encourage him to write it with many different media: crayons, pencils, paints, etc. Suggest he find as many things as he can that begin with that letter. Invite him to draw pictures of some of these items. Write a list of the items and read the words with him.
Dictation
Read your child some simple rhymes and poems. Invite him to tell you a rhyme, poem, or short story in return. Write down the words as he says them, then read them back to him. This is a fun way to interact with your child and shows the pre-reader that words can be recorded by writing, and then recalled by reading.
Label the House
This is a fun way for your child to run around the house while learning the letters. Invite your child to touch an item and say its name. Write the first letter of the item on a sticky note. Then say the word and letter’s sound. Invite your child to repeat the name and sound several times. Now invite your child to run and attach the sticker onto the item. Encourage your child to say the letters’ sounds as he encounters the attached notes throughout the day.
Learn to Write
Trace the Shape: Write large letters on cards. Beginning with one letter card, show your child how to trace over the letter shape using his fingers. Make sure to trace the shape in the same pattern that you write the letter. Say the letter’s sound. Now show your child how to write the letter on lined paper. Encourage him to trace the letter and say its sound each time he writes it. Keep the lessons short and fun. Do a few letters each day until all the alphabet has been introduced.
Finger Paint
Spread a thick blob of fingerpaint or pudding on fingerpaint paper. Let your child swirl the paint for a while, then show him how to draw one or more letters in the goo. Invite him to smooth the surface and draw more letters while saying their sounds.
Trace the Letter
When you are out walking, take a stick and scratch letters into mud, sand, or snow. Say the letters’ sounds. Invite your child to do the same. Once your child is reading and writing words, take turns writing and reading words and short sentences drawn outside.
Stringing Letters
Once your child knows the sounds of the letters, he can begin stringing them together to form short words. At first he many not understand that c–a–t represents a cat, but with a little practice he will get the idea. To prepare for this, make a set of alphabet letters, writing the vowels in blue and the consonants in red. Find or draw pictures of some three-letter words. Ask your child to set out all the alphabet cards in rows. Show a picture to your child and tell him the sounds of the letters that make up the word. Say, “This is c, a, t. Can you please bring the c, a, t cards?” Have him set the letter cards next to the picture of the cat and say the letter sounds again. Say, “This is c, a, t. Cat.” Choose another picture of a three letter word (where the vowel says its short sound) and repeat the lesson. Here are a few words to get you started:
a—ant, ask, bag, bat, can, cap, cat, dad, fan, fat, ham, hat, jam, lad, lap, man, map, pan, rag, rat, sad, sat, back, camp, crab, flag, hand, mast, pant, rack, sand, sack, snap, black, brass, drank, grass, plant, quack, stamp, track
e—bed, beg, den, fed, hen, jet, men, net, peg, pen, pet, ten, vet, wet, yes, bell, belt, deck, dent, desk, fled, left, melt, neck, nest, sled, stem, tent, test, vest, well, west, yell, blend, dress, glass, grass, lemon, seven, smell, spell
i—it, bib, dig, fig, fin, ink, kid, lid, pig, pin, pit, rib, rim, rip, tin, wig, yip, zip, crib, dill, disk, fist, gift, gill, grin, hill, hilt, kiss, lint, list, milk, mill, mint, mist, mitt, pill, pink, silk, spin, tick, twig, twin, wick, wink, blimp, blink, brick, drill, drink, grill, prick, quill, quilt, stick, trick, kitten, mitten
o—box, cob, cot, dog, dot, fog, fox, hog, hop, hot, log, mom, mop, pop, pot, top, blob, doll, drop, frog, honk, lock, moss, pond, rock, sock, stop, block, clock, cross, flock, floss, frond, smock, stomp, locket, pocket, rocket
u—up, bud, bug, bun, bus, cub, cup, dug, gum, gun, hum, hut, mud, nun, nut, pup, rub, rug, rum, run, sun, tub, tug, buck, bunk, club, drug, drum, duck, dump, dust, grub, gull, hump, jump, lump, muff, plug, plus, pump, rust, slug, crust, truck, trunk, skunk, stump, muffin, pumpkin, trumpet
Once your child is comfortable and confident with short vowel words, introduce long vowel sounds, such as cake, rain, hay, feed, seal, key, time, high, fly, home, boat, snow, mule, fuel, and new. Beginning readers can also learn that consonant pairs make different sounds, such as ship, chess, think, when, knife, and phone.
Building Sentences
As soon as your child can read a few words, show him how to read and write simple sentences. Introduce the words the, a, is, and I. Have him build them with alphabet cards, then write them on lined paper. Next, tell him a short sentence using words he is familiar with, such as, “The cat is hot.” Have him build the sentence with alphabet cards. Demonstrate, then invite him to write the sentence on lined paper. Show him that sentences begin with a capital letter and end with a period.
Another fun activity is to offer your child sets of words secured with a rubber band. These are short sentences that you have written cut into pieces to divide the words. Invite your child to read each word and arrange them in order to make a proper sentence. If he would like, he could copy the sentence onto lined paper.
Here’s another idea: prepare short sentences on strips of paper and place them in a basket or envelope. Invite your child to read the strips, and if desired, copy them onto lined paper.
Visit your local library and help your child choose books that he can read for himself. Sit with him and help him with any difficult words, and express your delight with his new reading ability.
Reading and Writing Paragraphs
Once your child is comfortable with reading and writing short sentences, show him how to link sentences together to make a paragraph. Expain that paragraphs are made of sentences about a similar theme or idea. Paragraphs can tell what happens, provide descriptions or explanations, or explain how something is done. They are also used to distinguish who is speaking in dialogue.
Look at several books and see how the authors divided their text into paragraphs. Discuss why they did that, what the theme of each paragraph is, and how one paragraph leads to another.
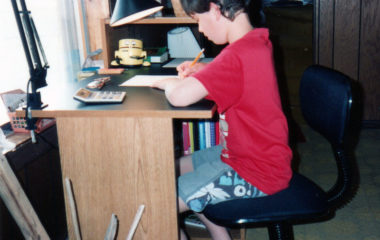
Encourage your child to make little books of his own on topics that interest him. To help him feel a sense of accomplishment, cut lined paper into half- or quarter-size pages, so he can do short, one-page projects that can be completed in one sitting. Once he has completed ten pages, add a colorful construction paper cover, then either staple the pages at the side or punch holes at the side and bind with yarn. Encourage him to read his books to friends and family members.
Now Read and Write!
The most important thing now is for your child to read and write every day. Visit 50 Writing Prompts for Students for lots of ideas to keep your child engaged and excited about creating lists, essays, and little books of his own.